Tuesday 10 November 2015


A couple of Material Studies (Brick and Jelly).
Learning a lot and gaining confidence the more I study and paint.
I planned to show my process but my PS file corrupt and had to paint over an earlier screen grab (save incrementally god damn it noob!).
I started of with grey scale values for a change and used a gradient adjustment layer method of painting, which did most the heavy lifting for me. Then continued to paint in details followed by a few adjustment layers.
Later I Painted in a few effects such as bounce light Fresnel and rim light etc. to really try bring the materials to life.

Wednesday 29 April 2015

Rococo Environment I worked on for school.
https://www.youtube.com/watch?v=XOSWOeAX1xw&feature=youtu.be
Here are the pieces i worked on. I made Base textures in Substance designer and compiled our Level build in UE4.


Wednesday 18 March 2015

Some books I hand painted for a one button or one axis mini game project for school.
which I sculpted in Zbrush, from a base mesh from 3dsMax. Then baked out bent space normals normals ao and cavity, to use as a base for hand paint.

The end result... i kinda ran out of time to push the table as far as i wanted. oh well :S

Friday 6 March 2015

Current WIP of the scene, i think its coming along alright. I'm not too confident in the couch at the moment, but I'll see how it bakes out.
The plan is too add skin details to the character in substance painter.. well attempt to lol, and put fire flys or something in the background for final comp.
for whats left to sculpt is the ice in the esky and maybe the ground plane with a few blades of grass n some rocks.. everyone loves rocks, gotta use rocks.

Tuesday 3 March 2015

Sculpting a small scene from this concept for class.
Intending to take it to PBR in unreal.

Here's the sculpt, just messing with a matcap to decide how i want to display my sculpt WIP's

A quick poly paint for the hell of it!


I plan to do the TV, the eski is a stretch goal.


Tuesday 24 February 2015

So, I've spent so much longer on this piece than intended, that I have decided to call it quits for now. Because I feel its just not teaching me anything any more (and stressing me that im not getting it how i want lol), So ill come back to it  at a later date and make a decent portfolio piece of it... When i feel the ability is there. I kind of want to attempt to sculpt this and try out some stylized pbr... we'll see :)

Saturday 21 February 2015

Spent a fair chunk of my day playing around with rocks still mainly focusing on colour, but I had a fair attempt at lighting this time.. still a long ways off what i hope to produce but I'm still proud for now.
For the blending I found a hard round brush with opacity set to 80% and transfer on which I felt gave me the most control over blending compared to other techniques I've tried.

Friday 20 February 2015

SO, With the thoughts of schools year long portfolio assessment. I decided I will really take this opportunity to attempt to tackle my weaknesses and really try make an artist of myself. The task, or 1 of, is to build a portfolio (derr!) and another to research something art related and report back to the class at the end of the year with a tutorial with what you have learned. So to kick things of I'm choosing COLOUR as my subject of interest. Although its a very broad topic.. i do mean all of it lol.
So in my first attempt I took a small study.. Or rather a test to see if i could put recent theories or observations to the test.
I really think things may already have clicked and its only my first attempt at taking this seriously.
Counting my chickens right?..
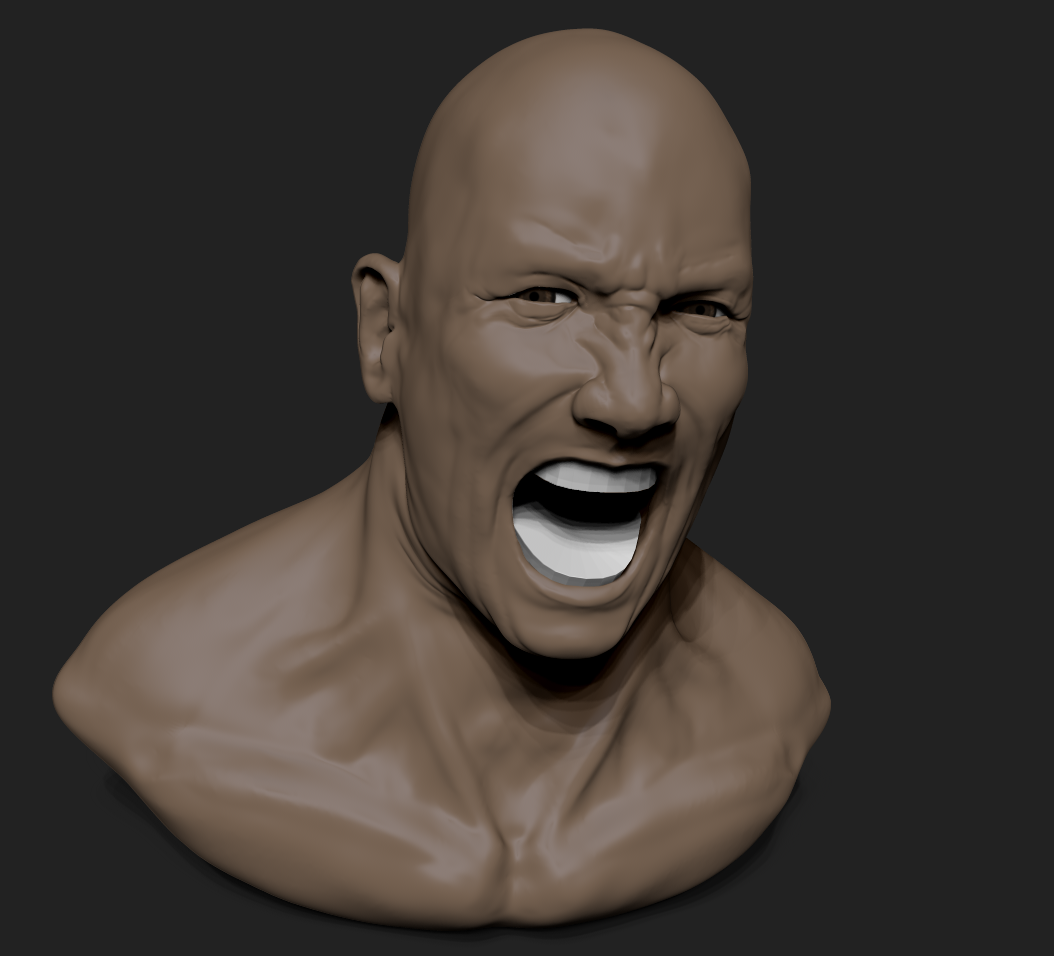
   Any way, here t'is (please forgive the anatomy and forms neither where the purpose of this study).
So my process here was to rough out a sketch and lay out a base colour.
I sketched out a bit of shadow and lighting to hopefully give me an idea of how to go (noticed I attempted to display wrapping around the muscles to show roundness.. I could have done a better job but MEH just practice and you don't learn unless you FINISH!) and duplicated the layer so that I wasn't to destructive.

I then grabbed a warmer slightly more saturated skin tone for shadows and proceeded to blend.

Next for my own piece of mind I blobbed in some highlights.

Then although hardly noticeable when I look at it now I attempted to add a little bit of red to the skin to add a bit of colour variation. Which I would really go alot harsher with it next time and not be afraid of it.

Now here was where I feel things finally start to make sense. I was always focusing on picking the right colours and never really followed a process like this before, and constantly getting frustrated But Hurray! It finally struck me. It's not about picking the right colours it's about what you add and how you mix it in (this obviously only applying to the lighting and shadows, colour schemes are a whole differnt story haha) so I lightly added a saturated redish-violet colour to the shadows and blended things through a little more... It may have been horribly obvious but you can get so caught up and frustrated watching all the tutorials and get mixed messages from them but the more you attempt your own theories from them the sooner things will click.

Finally, I added a bit of yellow to the skin, which I though would make a little sense around areas bones become prominent. Then obviously added a bit of a purply rim light.

Sunday 8 February 2015

Revisiting Friday's class time as i was severely disappointed in my performance lol.
can you guess who?
Getting there :).. teeth are a pain to do!